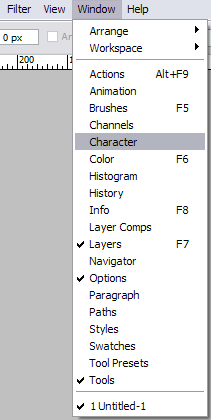
Lets show the menu
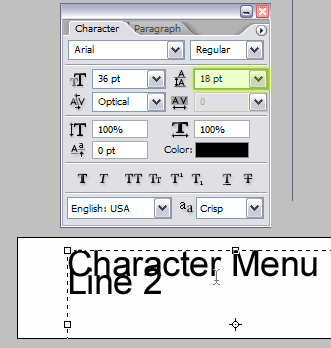
To start off, we need to show the Character Menu from the window options, go to Window > Character. This will show the character window in your application.
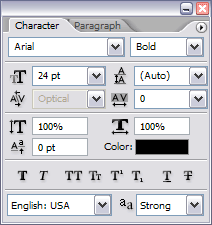
Alright, now that we have that window open, lets take a look at what each part does. First we need to create some text in your document. I used a new document to demonstrate this, but you can use whatever document you like. Create text by using the text tool:

Now that we have our text, you can change the font family with the first option which is found on the commonly used text toolbar.
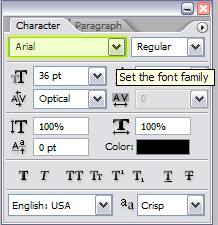
Or you can change the font type with the second option, which is also found on the text toolbar.
The other two options that appear on the text toolbar are text color and the font size. Two very commonly used options with text.
Let’s take a look at some options that are not on the text toolbar, but are very useful on the character palette. The first of which is the Line height option.
 Setting this value smaller than your text will cause the text to overlap, as seen by the following image.
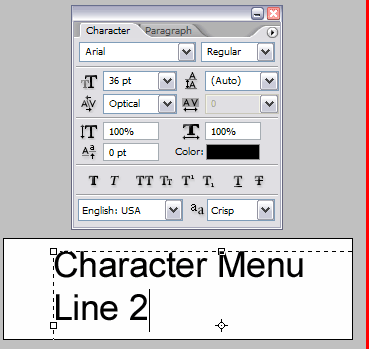
Next up is the Letter Spacing
 . Changing this option, which is in fact my favorite, will cause your letters to be more evenly spaced apart.
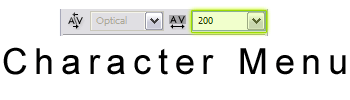
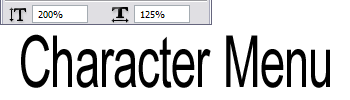
Another feature set of options, which are great for making logos, are the horizontal scalar tool and the vertical scalar tool. They can change the look of the text dramatically. Here is what they can do:
The next item on the list is the Baseline Shift. This option does exactly what it sounds like, it moves the text X pt above the baseline. This option is important if you need to keep the baseline inline with another element, but need the text to be higher (to keep the subtext below the baseline element for example.)
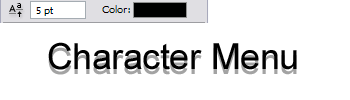
Here we have the first layer of text with a 0 pt baseline shift, and the second layer with a 5pt baseline shift. This could be very useful for faking drop shadows solid drop shadows, or to create a very basic 3d effect.
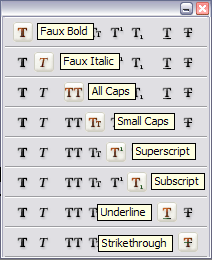
The last row of options is pretty basic, and can be found in any word processing program. I just labeled them for you to take a look at.
The reasons behind sharing these features of Adobe Photoshop with you are because they can create some very nice looking text and logos. For example:
The first part of this logo was spaced using the letter spacing option. The second part was a combination of letter spacing and superscript option.
I hope that you have learned something and can use your new found option in Adobe Photoshop to make some really sweet looking text.
No comments:
Post a Comment